AI VIDEO
Deine Stadt wird zur Open-World-Map.
Hamburg als GTA-Level, mit einer einzigen Mission: Feierabendbier. Vom Flughafen ins geklaute Flugzeug, über die Elbphilharmonie, mit dem Schirm auf St. Pauli. Kein Spiel, sondern neun Startbilder aus ChatGPT, einzeln in Pollo AI animiert und mit einem Gameplay-HUD überzogen.
- Pollo AI
- ChatGPT
- Remotion
- 2 Std
- Fortgeschritten
ERGEBNIS
Das ist dabei rausgekommen.
- 9Clips, einzeln erzeugt
- 8spro Clip, mit Ton
- 34sfertiges Reel
- 1Figur, neunmal dieselbe
-
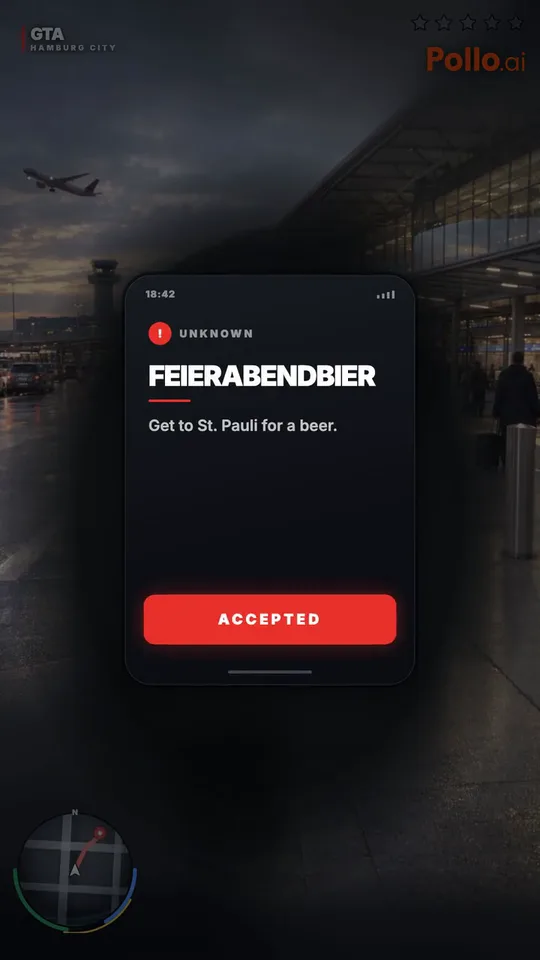 Der Auftrag kommt aufs Handy0:00 bis 0:02
-
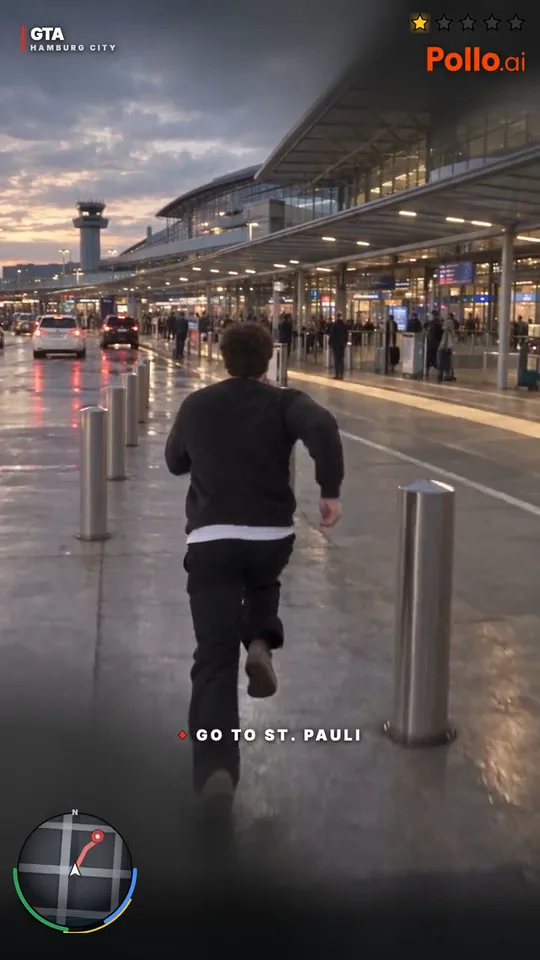 Der erste Stern0:05
-
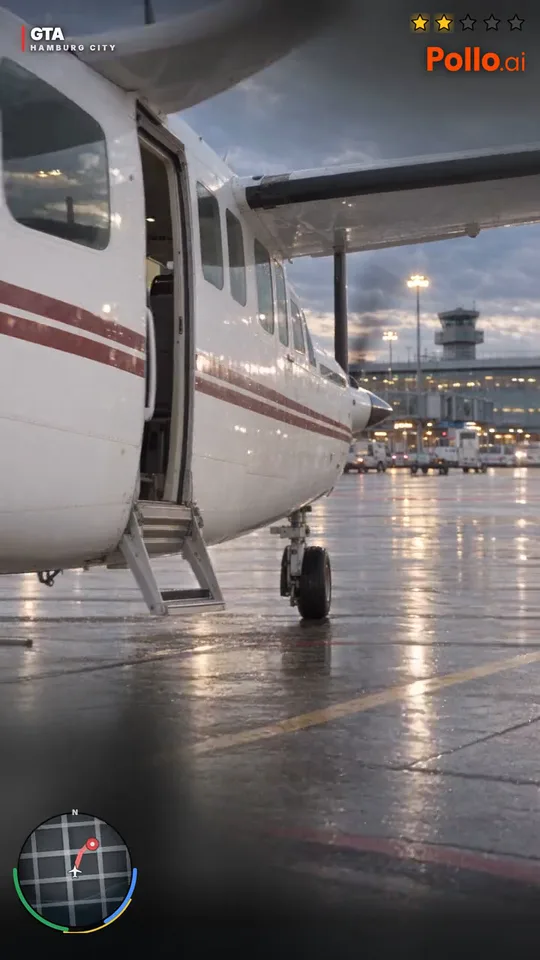 Radar wird zum Flieger0:13
-
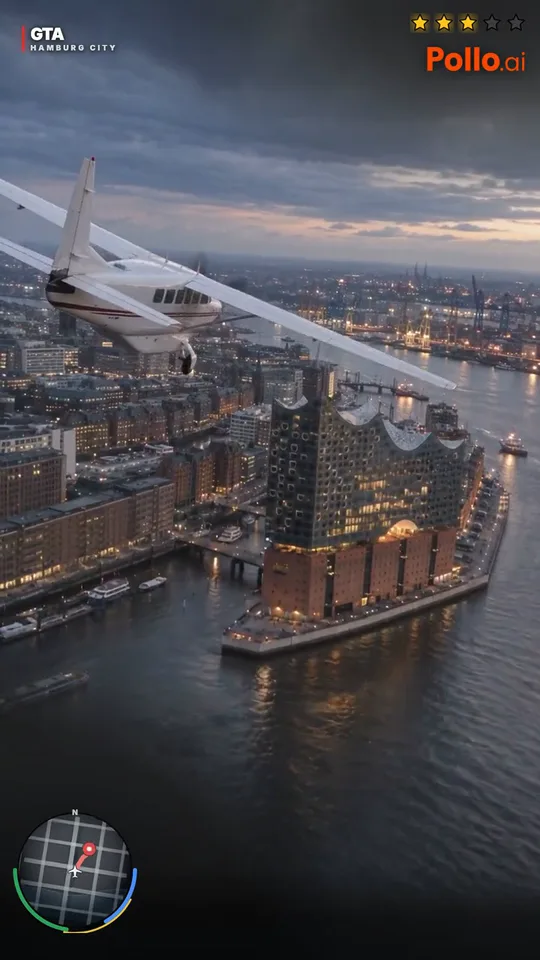 Drei Sterne über der Elbphilharmonie0:18
-
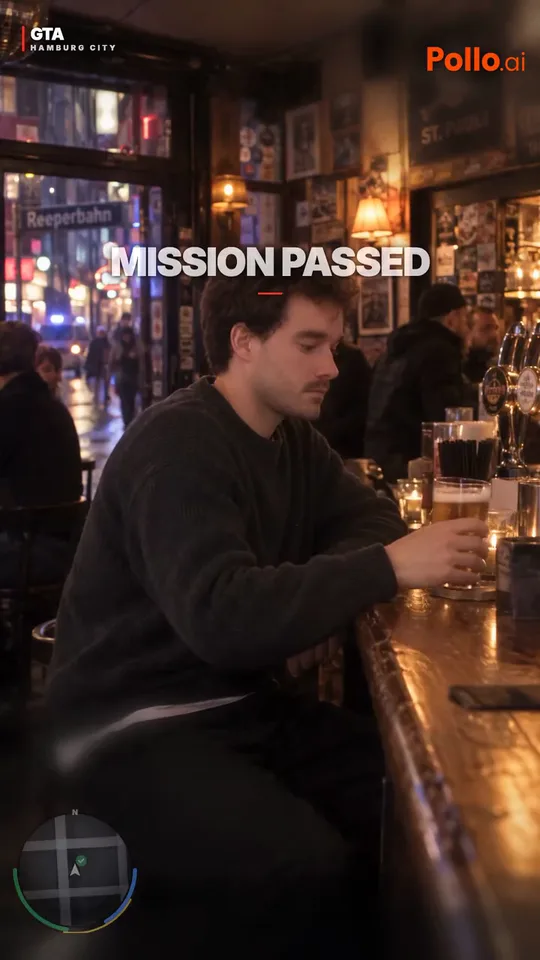 MISSION PASSED0:28
DAS BRAUCHST DU
Womit das gebaut ist.
 Pollo AI
 ChatGPT
- Remotion
-
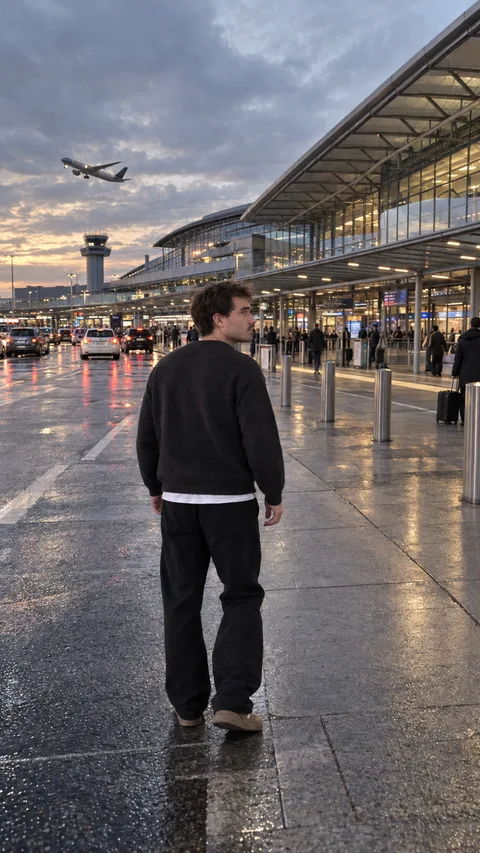 Flughafen, von außen0:00 bis 0:03
-
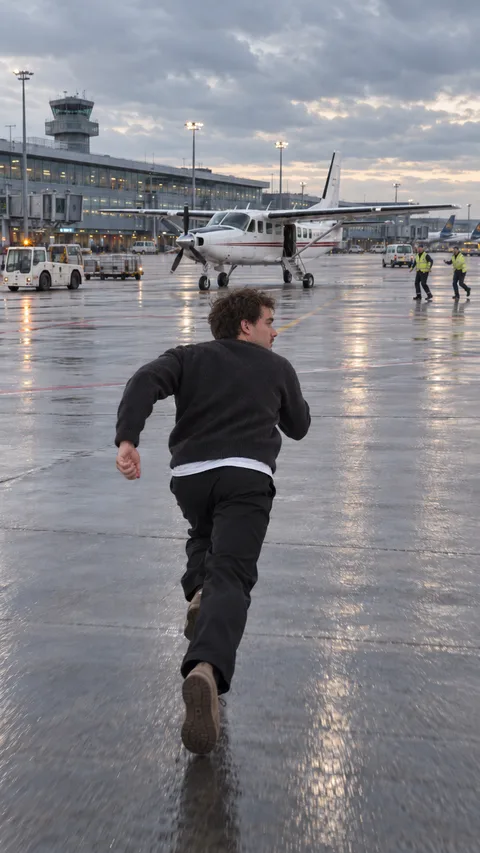 Sprint aufs Vorfeld0:03 bis 0:07
-
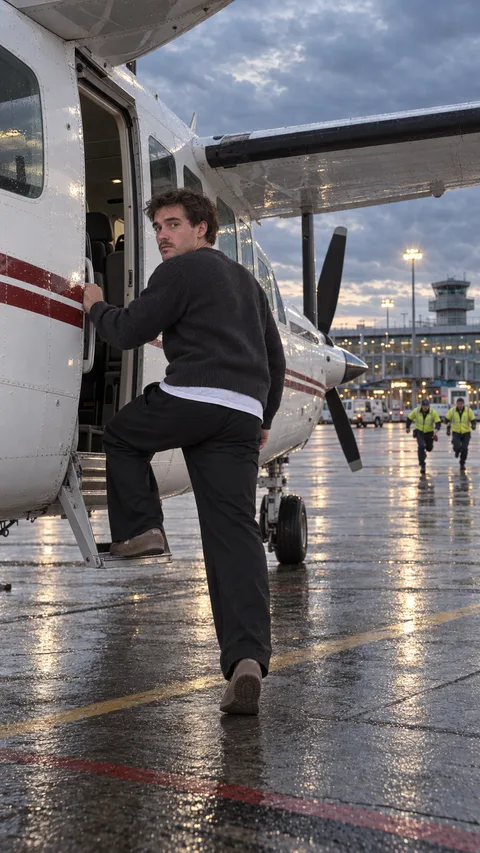 Einstieg in die Maschine0:07 bis 0:13
-
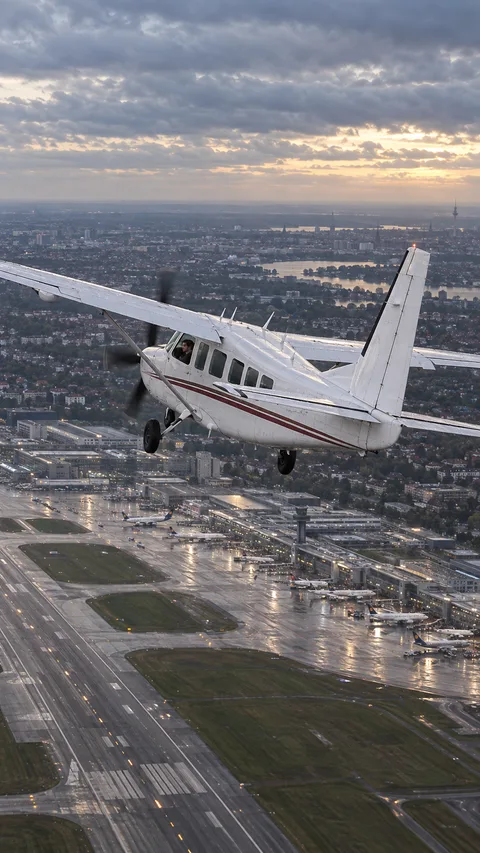 Abheben über die Bahn0:13 bis 0:17
-
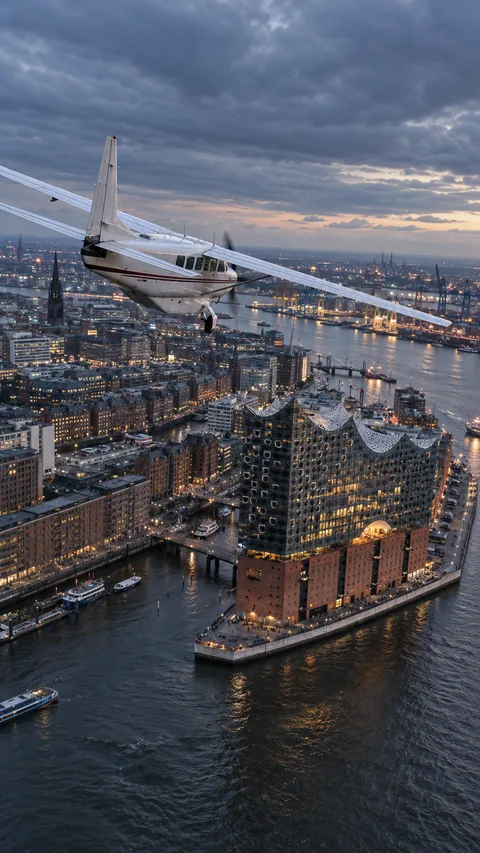 Über der Elbphilharmonie0:17 bis 0:22
-
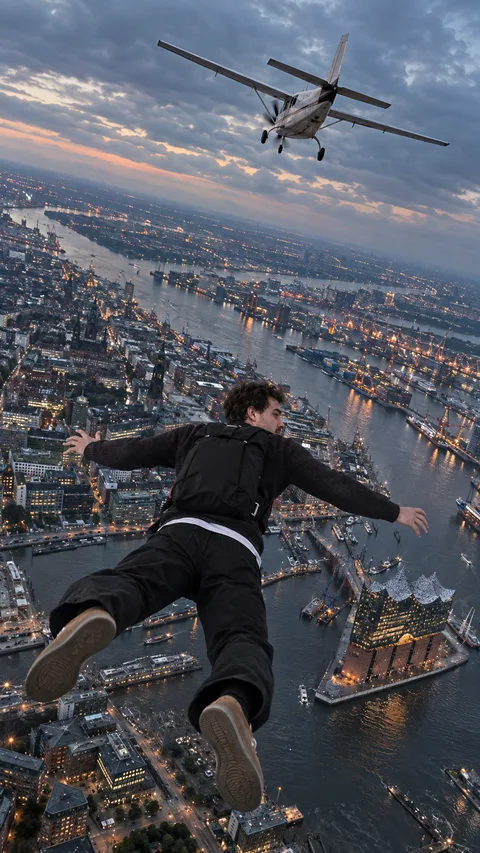 Absprung, freier Fall0:22 bis 0:25
-
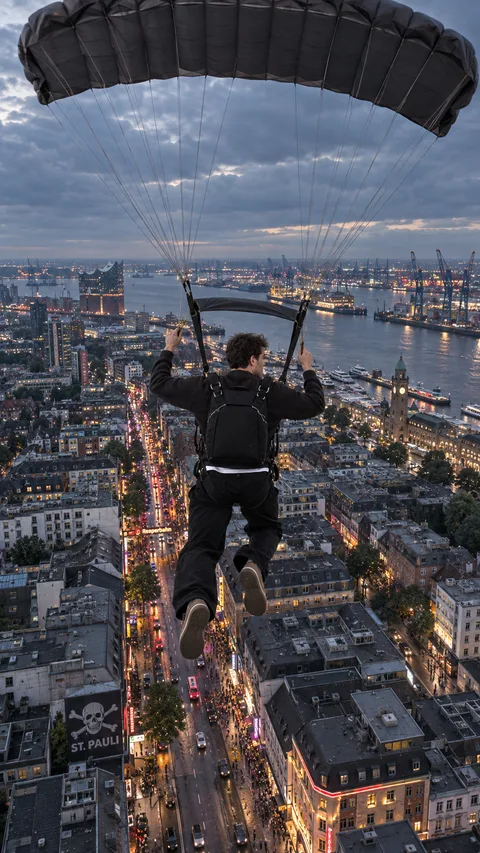 Schirm offen über St. Pauli0:25 bis 0:27
-
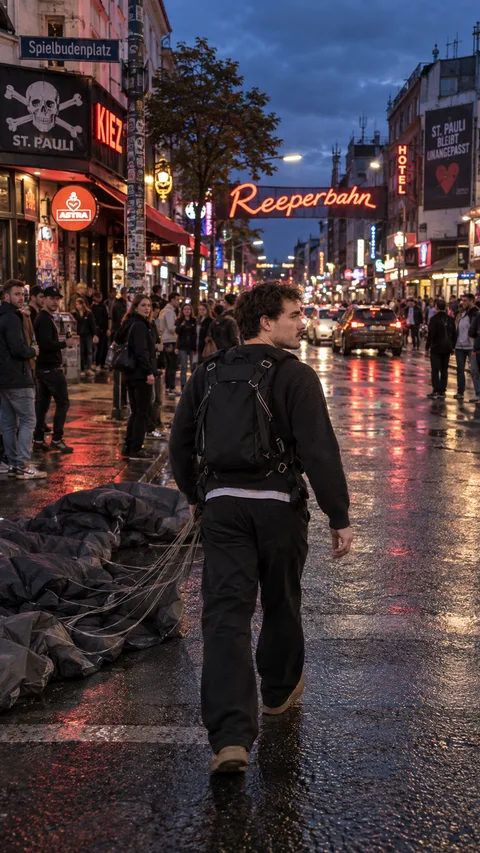 Ankunft auf der Reeperbahn0:27 bis 0:30
-
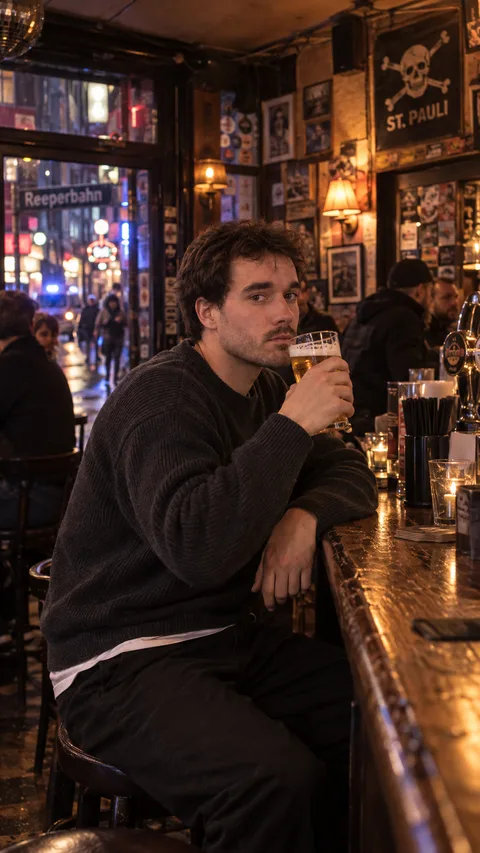 Feierabendbier am Tresen0:30 bis 0:34
ANLEITUNG
So baust du es nach.
-
Die Figur einmal festlegen
Bevor ein einziges Bild entsteht, brauchst du deine Figur als Datei. In ChatGPT ein Character Sheet bauen: vier Ganzkörperansichten von vorn, halb seitlich, im Profil und von hinten, dazu drei Kopfansichten, alles im selben Outfit vor neutralem Hintergrund. Die Vorlage dafür liegt unten im Creator Kit. Diese eine Datei geht in jede der neun Generierungen. Ohne sie trägt der Typ in Clip 3 eine andere Jacke als in Clip 7, und die Illusion, dass man einer Person zusieht, ist weg.
-
Neun Startbilder bauen, nicht neun Videos
Hier steckt die eigentliche Arbeit, und sie passiert im Bild, nicht im Video. Jede Szene ist ein einzelnes 9:16-Bild aus ChatGPT: Ort, Tageszeit, Wetter, Kameraposition und was die Figur gerade tut. Meine neun stehen weiter oben, von der Terminalfront bis zum Tresen. Wichtig ist die Kette: Die Kamera muss von Bild zu Bild plausibel weiterwandern, sonst wirkt es wie neun Postkarten statt wie eine Mission. Wetter und Tageszeit bleiben über alle neun gleich, bei mir Regen und Dämmerung.
-
Jedes Bild in Pollo AI animieren
Auf pollo.ai einloggen, als Modell Seedance 2.5 wählen und in den Image-to-Video-Modus gehen. Startbild hochladen, Format 9:16, Laufzeit acht Sekunden, Ton an. Der Bewegungs-Prompt bleibt kurz und beschreibt nur, was sich bewegt: „he sprints toward the parked planes, camera follows from behind, handheld“. Alles Gestalterische steckt schon im Startbild. Neunmal wiederholen. Rechne mit zwei bis drei Versuchen pro Szene, bis die Bewegung sitzt.
-
Die neun Clips stumpf aneinanderlegen
Keine Überblendungen, keine Effekte, kein Umsortieren. Neun harte Schnitte in der Reihenfolge der Startbilder, das ergibt rund 34 Sekunden. Genau diese Härte lässt es nach Gameplay aussehen: In einem Spiel blendet auch nichts ineinander. Den Ton der Clips behältst du, Seedance liefert Raumton, Triebwerk, Fahrtwind und Kneipe gleich mit. Musik kommt später in der App darüber, nicht in den Schnitt.
-
Das HUD drüberlegen
Erst das HUD macht aus neun schönen Clips eine Mission. Unten links die Minimap mit Route, oben rechts die Fahndungssterne, am Anfang die Missionskarte, am Ende MISSION PASSED. Der Master-Prompt im Creator Kit beschreibt das komplett, inklusive der Stern-Logik über die Laufzeit. Du kannst ihn einem Schnitt-Werkzeug mit KI geben oder als Bauplan für dein eigenes Overlay nehmen. Bei mir hat Remotion das HUD gebaut, also Code über dem Video, nicht eine KI. Der Prompt ist die Vorgabe dafür, und er funktioniert genauso als Checkliste, wenn du das Overlay von Hand setzt.
CREATOR KIT
Alles, was du brauchst.
Use the supplied final Hamburg gameplay-style source video as the base footage and create a polished final edited vertical 9:16 social video that feels like a highly cinematic, hyper-realistic GTA-style gameplay mission set in Hamburg.

IMPORTANT:
The provided source video is the primary base layer. Do not replace the whole clip. Preserve the existing footage, character identity, locations, plane, parachute, Hamburg atmosphere, and story flow. The job is to improve the video in post through editing, compositing, overlays, masking, sound design, HUD design, pacing adjustments, and selective insert edits.

GOAL:
Transform the source clip into a convincing final "GTA in Hamburg" mission video that feels like one coherent gameplay capture, not just an AI video montage. The final piece should look cleaner, more intentional, more game-like, and more immersive.

CORE STORY:
A player-character in Hamburg receives a mission, runs into Hamburg Airport, steals a small plane, flies over Hamburg past the Elbphilharmonie, jumps out, parachutes toward St. Pauli, reaches the Kiez, and ends in a bar drinking a beer.

EDITING PRIORITIES:
1. Preserve the strongest existing footage.
2. Improve gameplay immersion through stable HUD and sound.
3. Replace weak AI-generated UI elements with clean designed overlays.
4. Fix or hide inconsistent wanted stars and mission text.
5. Emphasize smooth mission logic and continuity.
6. Make the whole result feel like premium GTA-style gameplay.

DO NOT:
- do not replace the protagonist
- do not change his face
- do not change the outfit
- do not change the locations
- do not change the aircraft type
- do not use random stock footage
- do not introduce unrelated scenes
- do not over-stylize with glitch effects
- do not turn it into a trailer montage
- do not make it look like a real-life documentary
- do not use subtitles
- do not use heavy meme editing
- do not use fast random jump cuts
- do not use generic cinematic music that overpowers the gameplay feel

VISUAL IDENTITY:
The final result should feel like:
- GTA-style open-world gameplay
- clean screen-space HUD
- controlled third-person mission structure
- hyper-realistic next-gen game presentation
- authentic Hamburg locations
- strong mission-based pacing
- restrained but satisfying sound design

HUD / GAMEPLAY OVERLAY DESIGN:
Create and composite a clean GTA-inspired gameplay HUD across the video. The HUD should feel polished, minimal, and consistent.

HUD rules:
- all HUD elements are fixed screen-space overlays
- they remain locked to the screen
- they never drift, wobble, or change position with the camera
- they never appear embedded into the environment
- they never flicker
- they stay visually consistent throughout the clip

HUD elements to include:
- bottom-left circular minimap / radar
- health bar
- armor bar
- optional stamina bar
- small player/status detail area
- top-right wanted stars
- optional small objective hint area
- optional short mission-complete banner at the end

MISSION START UI:
At the beginning of the clip, replace or cover any weak AI-generated mission popup with a cleaner GTA-style mission start sequence.

Design a brief in-game phone / mission alert moment:
- subtle notification chime
- compact phone or mission-card style overlay
- short readable mission text
- quick accept moment

Mission title:
FEIERABENDBIER

Objective text:
Get to St. Pauli for a beer.

Keep the design readable, crisp, and premium.
Do not clutter the screen with too much text.
The UI should appear only briefly and then disappear.

TEXT OVERLAYS:
Use only a small amount of readable text.
All text should look intentional, clean, and game-like.

Recommended text moments:
- beginning mission card:
  FEIERABENDBIER
  Get to St. Pauli.
- optional small objective update:
  Go to St. Pauli.
- ending:
  MISSION PASSED
  FEIERABENDBIER

Do not show too much text elsewhere.

WANTED LEVEL LOGIC:
Override or replace any inconsistent stars in the base footage.
Wanted stars must evolve logically and consistently.

Desired wanted progression:
- 0:00-0:05 = no stars
- 0:05-0:11 = 1 star
- 0:11-0:17 = 2 stars
- 0:17-0:24 = 3 stars
- 0:24-0:27 = 3 stars blinking
- 0:27 to end = stars fade away / disappear

The stars should feel like real gameplay logic, not random decoration.

MINIMAP / OBJECTIVE ROUTE:
The minimap should support the gameplay fantasy.
Show:
- a player arrow
- a route / objective direction
- a destination associated with St. Pauli
- during the airport section, the route should imply movement toward the plane / mission progression
- during the city / parachute phase, the route should imply travel toward St. Pauli

Do not overcomplicate the map.
Keep it readable and clearly GTA-inspired.

SOUND DESIGN:
Build the final soundscape as if this is real gameplay footage.

Use layered, polished sound design:
- subtle ambient airport exterior at the beginning
- recognizable game-like mission notification chime
- small phone UI interaction sounds
- footsteps on wet pavement
- distant road traffic
- subtle apron ambience
- distant airport workers / operational ambience
- aircraft engine start
- turboprop spin-up
- propeller acceleration
- takeoff roll / aviation movement
- airflow and wind during the flight
- strong rushing wind during freefall
- parachute deployment snap
- softer canopy / air movement under parachute
- distant city ambience while descending over Hamburg
- St. Pauli nightlife ambience
- bar room ambience
- beer glass / counter contact sound
- short satisfying mission-complete sound at the end

AUDIO STYLE:
- no cheesy EDM
- no overpowering epic trailer music
- if music is used at all, keep it subtle, game-like, tension-building, and low in the mix
- gameplay immersion and environmental sound should dominate

DIALOGUE / VOICE:
Keep dialogue minimal.
If desired, include only one very short background line near the airport, such as:
"Hey! Stop!"
or a similar short airport-worker shout.
No subtitles.

PACE / RHYTHM:
Keep the clip tight and readable.
The edit should feel like one polished mission flow.
Do not make it too chaotic.
Do not interrupt the viewer with too many cuts.

CONTINUITY FIXES:
Use editing to hide or improve any awkward AI transitions:
- cover weak mission popup areas with cleaner overlays
- cover inconsistent stars with stable new stars
- use sound and motion emphasis to smooth the plane takeoff transition
- smooth the transition from airborne sequence into jump / parachute
- if needed, use a short insert before the bar to make the St. Pauli arrival feel more complete

OPTIONAL INSERT / LANDING FIX:
If an additional landing / street-level Kiez shot is available, insert a very short shot between the parachute descent and the bar entry:
- show arrival near the Reeperbahn / St. Pauli
- maintain the same protagonist and outfit
- if parachute gear is visible, that is fine
- the insert should last roughly 1 to 2 seconds
- it should act as the missing "landed on the Kiez" payoff
- then transition into the bar

If no extra landing shot is available, create the feeling of arrival using a strong audio bridge, a very short visual bridge, or a masked continuity cut.

END SEQUENCE:
The ending should feel satisfying and humorous.
By the time the character is at the bar:
- wanted level is gone
- HUD remains clean
- the environment is calm
- the beer moment lands like the mission has been completed

At the end, show a clean GTA-style completion overlay:
MISSION PASSED
FEIERABENDBIER

Keep it visually elegant, iconic, and readable.
Accompany it with a short completion chime.

FINAL OUTPUT:
Deliver a final polished vertical 9:16 video that feels like a premium GTA-style mission in Hamburg, with clean HUD, corrected mission logic, improved continuity, strong sound design, and a satisfying finished ending.
Vertical 9:16 photographic still, hyper-realistic, next-gen video game
look, third-person perspective, cinematic colour grading, shot on a
35mm lens.

THE PERSON: the character from the attached reference sheet. Same face,
same hair, same outfit in every image.

THE PLACE: [HIER DEINEN ORT, zum Beispiel: the main terminal of Hamburg
Airport, seen from the drop-off lane].

TIME AND WEATHER: [GLEICH IN ALLEN NEUN BILDERN, zum Beispiel: blue
hour, light rain, wet reflective asphalt, warm sodium lights].

CAMERA: [WAS DIE KAMERA MACHT, zum Beispiel: behind the character at
shoulder height, he walks away from camera toward the entrance].

ACTION: [WAS ER TUT, zum Beispiel: walking, hands loose, unhurried].

No text, no logos, no watermark, no HUD, no user interface. Nothing in
the frame that names a real brand or a real game.
Character sheet, one image, seven panels on a plain off-white studio
background, even soft light, no shadows on the backdrop.

TOP ROW, four panels, full body head to toe, same person, same outfit,
same shoes in all four: front view, three-quarter view, left profile,
back view. Feet fully visible, arms relaxed at the sides, neutral face.

BOTTOM ROW, three panels, head and shoulders only, same person: front,
three-quarter, profile. Hair fully visible, neutral expression.

The person: [HIER DEINE FIGUR BESCHREIBEN, zum Beispiel: man in his late
twenties, dark curly hair, dark crewneck sweater over a white tee, black
wide trousers, brown suede shoes, small black backpack].

Photographic, not illustrated. Identical face, identical hair, identical
outfit in every panel. No text, no labels, no watermark, no props.
SETTINGS
Die Einstellungen im Überblick.
| Plattform | Pollo AI |
|---|---|
| Modell | Seedance 2.5 |
| Modus | Image to Video (Startbild) |
| Startbilder | 9 Stück, 9:16, aus ChatGPT |
| Format | 9:16 |
| Dauer | 8s pro Clip, 34s fertig |
| Ton | entsteht im selben Durchlauf |
| HUD | Remotion, als Code über dem Video |
WORAUF ES ANKOMMT
Darauf musst du achten.
Das Startbild entscheidet, nicht der Bewegungs-Prompt
Bei Image-to-Video ist praktisch alles schon festgelegt, bevor das Modell loslegt: Ort, Licht, Outfit, Bildausschnitt, Stimmung. Der Prompt darf dann nur noch beschreiben, was sich bewegt. Wer im Bewegungs-Prompt anfängt, die Szene nochmal zu beschreiben, bekommt ein Modell, das gegen sein eigenes Startbild arbeitet und nach zwei Sekunden anfängt, Dinge umzubauen.
Acht Sekunden sind die Erzähleinheit
Jeder Clip kann genau einen Gedanken tragen: hinlaufen, einsteigen, abheben. Wer zwei Handlungen in acht Sekunden presst, bekommt beide halb. Deshalb sind es neun Szenen und nicht fünf, und deshalb steht in jedem Startbild schon der Moment, den der Clip zeigen soll. Die Mission entsteht in der Reihenfolge, nicht im einzelnen Clip.
Das HUD muss auf dem Schirm kleben
Der Teil des Master-Prompts, der am meisten trägt, ist der langweiligste: Alle HUD-Elemente sind fest im Bildschirmraum, sie wandern nicht mit der Kamera, sie flackern nicht, sie wechseln nicht die Position. Genau das unterscheidet ein Spiel-Interface von einem aufgeklebten Sticker. Sobald die Minimap einmal mitschwenkt, sieht das ganze Video nach Video aus und nicht mehr nach Mitschnitt.
Die Fahndungssterne brauchen eine Begründung
Im Rohmaterial sprangen die Sterne wild hin und her, weil das Modell sie einfach hübsch fand. Im Master-Prompt hängen sie an der Handlung: null beim Gehen, einer beim Rennen, zwei beim Einsteigen in ein fremdes Flugzeug, drei in der Luft, blinkend beim Absprung, weg auf dem Kiez. Das liest jeder sofort, auch wer nie GTA gespielt hat, weil es einer Logik folgt statt einem Zufall.
Deine Stadt, dein Level.
Neun Startbilder, neun Durchläufe in Pollo AI, ein HUD darüber. Das Schwierigste daran ist die Entscheidung, welche drei Orte deine Stadt erkennbar machen. Der Rest steht oben.
FAQ